Last updated 11/2018
MP4 | Video: h264, 1280x720 | Audio: AAC, 44.1 KHz
Language: English | Size: 894.48 MB | Duration: 2h 55m
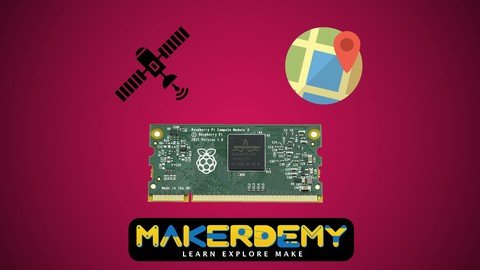
Get up and running with compute module 3 and learn step by step to build a real-time vehicle monitoring system
What you'll learn
Install the different version of the Raspbian operating system in the Raspberry Pi compute module 3
Use the Raspberry Pi Compute Module 3 as a full-fledged computer
Assign static IP address in the newer version of the Raspbian OS
Exchange files remotely using Filezilla
Remotely access the terminal and the graphical user interface
Fetch the GPS raw data from the GPS module and parse as per your requirement
Visualize the real-time movement of the vehicle by streaming the data to an online dashboard
Learn how to implement IoT and harness the power of Raspberry Pi compute module 3
Requirements
Basic knowledge of Linux commands and Python programming
Raspberry Pi compute module 3 Development kit
Description
In this course, I will help you to explore Raspberry Pi compute module 3 in detail. You will learn how compute module 3 is superior to all the different versions of Raspberry Pi.
The course requires basic knowledge of Linux commands and Python programming. If you are new to Raspberry Pi, I would recommend you to enroll in my previous course "Introduction to Raspberry Pi," which is also available on Udemy.
In this course, I will guide you on how to connect your keyboard and monitor with Compute Module 3 and use it as a full-fledged computer. Once you are up and running with Compute Module 3, you will also learn how to remotely control the compute module 3 and exchange files wirelessly via internet.
The Raspberry Pi Foundation released a long-awaited version of their Raspberry Pi Compute Module 3. The great news is that you get 4GB storage, 1GB memory and the same processor as the Raspberry Pi 3 for $30. This means that it now becomes a real solution for anybody wanting to build the industrial and IoT-based project.
Compared to Raspberry Pi 3, the compute module has more GPIO pins for interfacing different set of sensors. The default IO board of compute module comes with four ports which can connect dual camera and display.
In the remote vehicle monitoring project, you will learn how compute module 3 is actually implemented in real time and displays the data with high precision and accuracy. You will also see how the graphics rendering is different in compute module 3 and the Raspberry Pi 3 respectively.
The entire project will be discussed step by step along with real-time demonstration of the output.
I will also share the source code so that you can replicate the project on your own.
If you face any technical issue during the development process, please post your query in the udemy discussion forum or write directly to me at
I will get back to you within one business day.
Overview
Section 1: Introduction to Raspberry Pi compute module 3
Lecture 1 What will you learn from this course
Lecture 2 Introduction to Raspberry Pi compute module 3
Lecture 3 Getting started with Raspberry Pi compute module 3
Lecture 4 Component list
Lecture 5 Flashing the Raspberry Pi compute module 3
Lecture 6 Peripherals assembly and bootup
Lecture 7 Flashing the micro SD card for Raspberry Pi compute module 3 Lite
Lecture 8 Hardware assembly and boot up with Raspberry Pi compute module 3 Lite
Lecture 9 Exploring the Raspbian Jessi Pixel OS
Section 2: Remote access and GPIO configuration
Lecture 10 Accessing terminal remotely
Lecture 11 Graphical desktop sharing
Lecture 12 Expansion header
Lecture 13 Testing the GPIO
Section 3: Testing and configuring GPS breakout module
Lecture 14 Project concept and hardware specification
Lecture 15 Hardware requirements and testing the GPS module
Lecture 16 Circuit diagram - GPS connection
Lecture 17 Circuit diagram - GPS connection with Raspberry Pi compute module IO board
Lecture 18 Understanding GPSD
Lecture 19 Troubleshooting the GPS breakout module
Lecture 20 Fetching raw data from the GPS module using Python
Lecture 21 Source code - Fetching raw data using Python
Lecture 22 Parsing the raw data received from the GPS module
Lecture 23 Source code - parsing the required data
Section 4: Vehicle tracking system
Lecture 24 Circuit diagram explanation - Vehicle tracking system
Lecture 25 Circuit diagram - Vehicle tracking system
Lecture 26 IoT Dashboard - Real time data visualization
Lecture 27 Data analytics for Internet of Things (IoT)
Lecture 28 Lecture 27.1 : How to setup Initial State Dashboard for GPS Tracking?
Lecture 29 Geocoding
Lecture 30 Programming - importing library and defining the try block
Lecture 31 Programming - Data parsing and publishing the record
Lecture 32 Source code - Vehicle tracking system
Lecture 33 Real time demo - Vehicle tracking system
Lecture 34 Real time demo - Vehicle tracking system using Raspberry Pi 3
Lecture 35 Boot time comparison between Compute module 3 and Raspberry Pi 3
Lecture 36 Conclusion
Anyone who wants to explore Raspberry Pi compute module 3 as a full-fledged Linux based computer ,Hobbyist or developers who wants to build real-time IoT based project,Anyone who wants to build vehicle monitoring system and implement in real time,Anyone who wants precise output without lag
Homepage
https://www.udemy.com/course/raspberry-pi-compute-module-3-from-novice-to-professional/
https://rapidgator.net/file/7d51f14e624606236ec6272611df73fd/qnsbz.Raspberry.Pi.Compute.Module.3..From.Novice.To.Professional.rar.html

https://uploadgig.com/file/download/6ee6e4bE20fa3Dec/qnsbz.Raspberry.Pi.Compute.Module.3..From.Novice.To.Professional.rar

https://nitroflare.com/view/AAF78C8E20767BE/qnsbz.Raspberry.Pi.Compute.Module.3..From.Novice.To.Professional.rar
Links are Interchangeable - No Password - Single Extraction
